深入淺出React高階組件
背景知識
在開始講述高階組件前,我們先來回顧高階函數的定義:接收函數作為輸入,或者輸出另一個函數的一類函數,被稱作高階函數。對於高階組件,它描述的便是接受React組件作為輸入,輸出一個新的React組件的組件。
更通俗地描述為,高階組件通過包裹(wrapped)被傳入的React組件,經過一系列處理,最終返回一個相對增強(enhanced)的React組件,供其他組件調用。
實現一個高階組件
下面我們來實現一個最簡單的高階組件(函數),它接受一個React組件,包裹後然後返回。
export default function withHeader(WrappedComponent) { return class HOC extends Component { render() { return <div> <div className="demo-header"> 我是標題 </div> <WrappedComponent {...this.props}/> </div> } }}
在其他組件里,我們引用這個高階組件,用來強化它。
@withHeaderexport default class Demo extends Component { render() { return ( <div> 我是一個普通組件 </div> ); }}
在這裡使用了ES7里的decorator,來提升寫法上的優雅,但是實際上它只是一個語法糖,下面這種寫法也是可以的。
const EnhanceDemo = withHeader(Demo);
隨後,觀察React組件樹發生了什麼變化,如圖所示,可以發現Demo組件被HOC組件包裹起來了,符合了高階組件的預期,即組件是層層包裹起來的,如同洋蔥一樣。

但是隨之帶來的問題是,如果這個高階組件被使用了多次,那麼在調試的時候,將會看到一大堆HOC,所以這個時候需要做一點小優化,就是在高階組件包裹後,應當保留其原有名稱。
我們改寫一下上述的高階組件代碼,增加了getDisplayName函數以及靜態屬性displayName,此時再去觀察DOM Tree。
function getDisplayName(component) { return component.displayName || component.name || "Component";}export default function (WrappedComponent) { return class HOC extends Component { static displayName = `HOC(${getDisplayName(WrappedComponent)})` render() { return <div> <div className="demo-header"> 我是標題 </div> <WrappedComponent {...this.props}/> </div> } }}
此時,原本組件的名稱正確地顯示在了DOM Tree上。
這個簡單的例子里高階組件只做了一件事,那便是為被包裹的組件添加一個標題樣式。這個高階組件可以用到任何一個需要添加此邏輯的組件上,只需要被此高階組件修飾即可。

由此可以看出,高階組件的主要功能是封裝並抽離組件的通用邏輯,讓此部分邏輯在組件間更好地被複用。
高階組件的進階用法
組件參數
還是以上述例子為例,此高階組件僅僅只是展示了我是標題這個名稱,但是為了更好的抽象,此標題應當可以被參數化,如下方式調用。
// 如果傳入參數,則傳入的參數將作為組件的標題呈現@withHeader("Demo") export default class Demo extends Component { render() { return ( //... ); }}
withHeader需要被改寫成如下形式,它接受一個參數,然後返回一個高階組件(函數)。
export default function (title) { return function (WrappedComponent) { return class HOC extends Component { render() { return <div> <div className="demo-header"> {title ? title : "我是標題"} </div> <WrappedComponent {...this.props}/> </div> } } }}
使用ES6寫法可以更加簡潔。
export default(title) => (WrappedComponent) => class HOC extends Component { render() { return <div> <div className="demo-header"> {title ? title : "我是標題"} </div> <WrappedComponent {...this.props}/> </div> }}
如圖可以看到,傳入的參數已經反映在DOM Tree里了。

柯里化 Curry
概念:只傳遞函數的一部分參數來調用它,讓它返回一個函數去處理剩下的參數。函數簽名:fun(params)(otherParams)應用:在React里,通過柯里化,我們可以通過傳入不同的參數來得到不同的高階組件。
基於屬性代理的方式
屬性代理是最常見的高階組件的使用方式,上述描述的高階組件就是這種方式。它通過做一些操作,將被包裹組件的props和新生成的props一起傳遞給此組件,這稱之為屬性代理。
export default function withHeader(WrappedComponent) { return class HOC extends Component { render() { const newProps = { test:"hoc" } // 透傳props,並且傳遞新的newProps return <div> <WrappedComponent {...this.props} {...newProps}/> </div> } }}
基於反向繼承的方式
這種方式返回的React組件繼承了被傳入的組件,所以它能夠訪問到的區域、許可權更多,相比屬性代理方式,它更像打入組織內部,對其進行修改。具體的可以參考附錄里提供的鏈接進行深入學習。
export default function (WrappedComponent) { return class Inheritance extends WrappedComponent { componentDidMount() { // 可以方便地得到state,做一些更深入的修改。 console.log(this.state); } render() { return super.render(); } }}
組合多個高階組件
上述高階組件為React組件增強了一個功能,如果需要同時增加多個功能需要怎麼做?這種場景非常常見,例如我既需要增加一個組件標題,又需要在此組件未載入完成時顯示Loading。
@withHeader@withLoadingclass Demo extends Component{}
使用compose可以簡化上述過程,也能體現函數式編程的思想。
const enhance = compose(withHeader,withLoading);@enhanceclass Demo extends Component{}
組合 Compose
compose可以幫助我們組合任意個(包括0個)高階函數,例如compose(a,b,c)返回一個新的函數d,函數d依然接受一個函數作為入參,只不過在內部會依次調用c,b,a,從表現層對使用者保持透明。基於這個特性,我們便可以非常便捷地為某個組件增強或減弱其特徵,只需要去變更compose函數里的參數個數便可。compose函數實現方式有很多種,這裡推薦其中一個recompact.compose,詳情見下方參考類庫。
高階組件實戰
實現一個loading組件
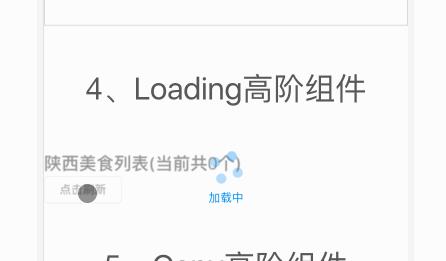
實現Loading組件時,發現需要去攔截它的渲染過程,故使用了反向繼承的方式來完成。
在通過裝飾器調用時,需要傳入一個函數作為入參,函數可以獲取到props,隨後返回一個Boolean對象,來決定組件是否需要顯示Loading態
import React, {Component} from "react";import {Spin} from "antd";export default function (loadingCheck) { return function (WrappedComponent) { return class extends WrappedComponent { componentWillUpdate(nextProps, nextState) { console.log("withLoading將會更新"); } render() { if (loadingCheck(this.props)) { return <Spin tip="載入中" size="large"> {super.render()} </Spin> } else { return super.render(); } } } }}// 使用@withLoading(props => { return props.IndexStore.accountList.length == 0;})
實現一個copy組件
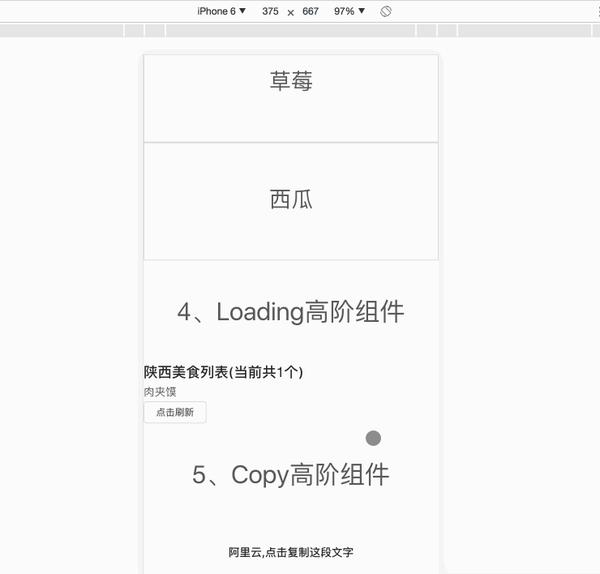
實現copy組件的時候,我們發現不需要去改變組件內部的展示方式,只是為其在外圍增加一個功能,並不會侵入被傳入的組件,故使用了屬性代理的方式。
import gotem from "gotem";import React, {Component} from "react";import ReactDom from "react-dom";import {message} from "antd";export default copy = (targetName) => { return (WrappedComponent) => { return class extends Component { componentDidMount() { const ctx = this; const dom = ReactDom.findDOMNode(ctx); const nodes = { trigger: dom, // targetName為DOM選擇器,複製組件將會複製它的值 target: dom.querySelector(targetName) }; gotem(nodes.trigger, nodes.target, { success: function () { message.success("複製成功"); }, error: function () { message.error("複製失敗,請手動輸入"); } }); } render() { return <WrappedComponent {...this.props}/>; } }; };}// 使用// 傳入 h3 ,讓複製組件去獲取它的值@copy("h3")class Info extends Component { render() { return ( <div> <h3> 阿里雲,點擊複製這段文字 </h3> </div> ); }}
與父組件區別
高階組件作為一個函數,它可以更加純粹地關注業務邏輯層面的代碼,比如數據處理,數據校驗,發送請求等,可以改善目前代碼里業務邏輯和UI邏輯混雜在一起的現狀。父組件則是UI層的東西,我們先前經常把一些業務邏輯處理放在父組件里,這樣會造成父組件混亂的情況。為了代碼進一步解耦,可以考慮使用高階組件這種模式。
開源的高階組件使用賞析
recompact
recompact提供了一系列使用的高階組件,可以增強組件的行為,可以利用此庫學習高階組件的寫法。
import recompact from "recompact"import { pure, withProps } from "recompact"const enhance = recompact.compose( withProps({ className: "beautiful" }), pure,)@enhanceclass Demo extends Component{}
React Sortable
通過使用此庫提供的高階組件,可以方便地讓列表元素可拖動。
總結
高階組件是Decorator模式在React的一種實現,它可以抽離公共邏輯,像洋蔥一樣層層疊加給組件,每一層職能分明,可以方便地抽離與增添。在優化代碼或解耦組件時,可以考慮使用高階組件模式。
參考
- recompact:包含了一系列實用的高階組件庫
- React Sortable:React拖動庫
- 深入理解 React 高階組件:其中詳細介紹了屬性代理和反向繼承的區別。
推薦閱讀: